الجمعة، 21 ديسمبر 2012

كود اضافة تأثير تحرك الصوره عند تحريك المؤشر فوقها في ملخص التدوينيه


Adding a Spinning Hover Effect to Blogger Popular Posts Widget 
السلام عليكم
مرحبا بكم في هذا الموضوع سأشرح كيفية اضافة تأثير يعمل عند تحريك 
مؤشر الفأرة على الصورة التي تكون في تلخيص التدوينية (في الصفحة الرائيسيه)
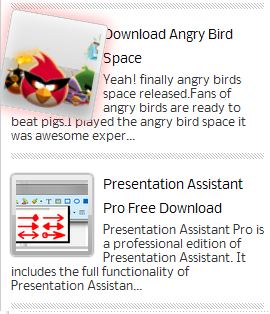
و الاضافة تعمل كما في الصورة اعلاه :) 
الان لكيفية تركيب هذه الاضافة:
  • اذهب للوحة تحكم مدونتك.
  • اضغط على القالب.
  • اضغط على زر تحرير Html
  • اشر على توسيع القوالب.
  • اضغط Ctrl+F و ابحث عن الوسم التالي:
]]></b:skin>
و الصق فوقه الكود التالي:

#PopularPosts1 {    max-width: 300px}

#PopularPosts1 dd {    float: left;    border-bottom: none;    margin: 8px 8px 0 8px;    background: none;    display: block;    padding: 0}


#PopularPosts1 img {    -webkit-transition: all 0.5s ease;    -moz-transition: all 0.5s ease;    transition: all 0.5s ease;    padding: 4px;    background: #eee;    background: -webkit-gradient(linear, left top, left bottom, from(#eee), color-stop(0.5, #ddd), color-stop(0.5, #c0c0c0), to(#aaa));    background: -moz-linear-gradient(top, #eee, #ddd 50%, #c0c0c0 50%, #aaa);    -webkit-border-radius: 4px;    -moz-border-radius: 4px;    border-radius: 4px;    -webkit-box-shadow: 0 0 3px rgba(0,0,0,.7);    -moz-box-shadow: 0 0 3px rgba(0,0,0,.7);    box-shadow: 0 0 3px rgba(0,0,0,.7);}


#PopularPosts1 img:hover {    -moz-transform: scale(1.2) rotate(-350deg);    -webkit-transform: scale(1.2) rotate(-350deg);    -o-transform: scale(1.2) rotate(-350deg);    -ms-transform: scale(1.2) rotate(-350deg);    transform: scale(1.2) rotate(-350deg);    -webkit-box-shadow: 0 0 20px rgba(255,0,0,.4), inset 0 0 20px rgba(255,255,255,1);    -moz-box-shadow: 0 0 20px rgba(255,0,0,.4), inset 0 0 20px rgba(255,255,255,1);    box-shadow: 0 0 20px rgba(255,0,0,.4), inset 0 0 20px rgba(255,255,255,1);}


  •  اضغط حفظ.
فقط! اتمنى ان تكون استفدت و اي استفسار يمكنك وضعه في تعليق:)

و سوف اجيب في اسرع وقت ممكن

تحياتي.


الخميس، 20 ديسمبر 2012

شريط قوائم رائع جداً يشبه شريط قوائم موقع " Apple "


السلام عليكم ورحمة الله وبركاته.

 اهلا وسهلا بكم في موضوع جديد وهذه المرة عن القوائم العلويه
هي شئ مهم تساعد الزائر على الوصول للاقسام او الصفحات بشكل اسرع
طبعا تم ترجمة الموضوع من قِبل مدونة ارشيف بلوجر ,المصدر 
فارجو ان تنال الاضافة اعجابكم الان مع كيفية التركيب.
  1. اذهب للوحة تحكم مدونتك .
  2. القالب.
  3. تحرير HTML'
  4. متابعه و اشر على توسيع القوالب.
  5. اضغط Ctrl+F من لوحة المفاتيح.
  6. ابحث عن الوسم التالي:
  ]]></b:skin>
7. قم بلصق الكود التالي قبله مباشره:
/* Flying Css3 menu www.bloggertrix.com*/

#flyingmenubt,#flyingmenubt ul {
list-style: none outside none;
margin: 0;
padding: 0;
height:500px;}
#flyingmenubt {
font-family: "Lucida Sans Unicode",Verdana,Arial,sans-serif;
font-size: 13px;
height: 36px;
list-style: none outside none;
margin: 40px auto;
text-shadow: 0 -1px 3px #202020;
width: 980px;
-moz-border-radius:4px;
-webkit-border-radius:4px;
border-radius:4px;
-moz-box-shadow: 0px 3px 3px #cecece;
-webkit-box-shadow: 0px 3px 3px #cecece;
box-shadow: 0 3px 4px #8b8b8b;
background-image: -webkit-gradient(linear, left bottom, left top, color-stop(0, #787878), color-stop(0.5, #5E5E5E), color-stop(0.51, #707070), color-stop(1, #838383));
background-image: -moz-linear-gradient(center bottom, #787878 0%, #5E5E5E 50%, #707070 51%, #838383 100%);
background-color:#5f5f5f;
}
#flyingmenubt ul {
left: -9999px;
position: absolute;
top: -9999px;
z-index: 2;
}
#flyingmenubt li {
border-bottom: 1px solid #575757;
border-left: 1px solid #929292;
border-right: 1px solid #5d5d5d;
border-top: 1px solid #797979;
display: block;
float: left;
height: 34px;
position: relative;
width: 105px;
}
#flyingmenubt li:first-child {
border-left: 0 none;
margin-left: 5px;
}
#flyingmenubt li a {
color: #FFFFFF;
display: block;
line-height: 34px;
outline: medium none;
text-align: center;
text-decoration: none;
background-image: -webkit-gradient(linear, left bottom, left top, color-stop(0, #787878), color-stop(0.5, #5E5E5E), color-stop(0.51, #707070), color-stop(1, #838383));
background-image: -moz-linear-gradient(center bottom, #787878 0%, #5E5E5E 50%, #707070 51%, #838383 100%);
background-color:#5f5f5f;
}

/* keyframes #animation1 */
@-webkit-keyframes animation1 {
0% {-webkit-transform: scale(1);}
30% {-webkit-transform: scale(1.3);}
100% {-webkit-transform: scale(1);}}
@-moz-keyframes animation1 {
0% {-moz-transform: scale(1);}
30% {-moz-transform: scale(1.3);}
100% {-moz-transform: scale(1);}}
#flyingmenubt li > a:hover {

-moz-animation-name: animation1;
-moz-animation-duration: 0.7s;
-moz-animation-timing-function: linear;
-moz-animation-iteration-count: infinite;
-moz-animation-direction: normal;
-moz-animation-delay: 0;
-moz-animation-play-state: running;
-moz-animation-fill-mode: forwards;
-webkit-animation-name: animation1;
-webkit-animation-duration: 0.7s;
-webkit-animation-timing-function: linear;
-webkit-animation-iteration-count: infinite;
-webkit-animation-direction: normal;
-webkit-animation-delay: 0;
-webkit-animation-play-state: running;
-webkit-animation-fill-mode: forwards;
}
#flyingmenubt li:hover > a {
z-index: 4;
}
#flyingmenubt li:hover ul.subs {
left: 0;
top: 34px;
width: 150px;
}
#flyingmenubt ul li {
background: none repeat scroll 0 0 #838383;
box-shadow: 5px 5px 5px rgba(0, 0, 0, 0.5);
opacity: 0;
width: 100%;
/*-webkit-transition:all 0.3s ease-in-out;
-moz-transition:all 0.3s ease-in-out;
-o-transition:all 0.3s ease-in-out;
-ms-transition:all 0.3s ease-in-out;
transition:all 0.3s ease-in-out;*/
}

/* keyframes #animation2 */
@-webkit-keyframes animation2 {
0% {margin-left:185px;}
100% {margin-left:0px;opacity:1;}
}
@-moz-keyframes animation2 {
0% {margin-left:185px;}
100% { margin-left:0px;opacity:1;}
}
#flyingmenubt li:hover ul li {
/* css3 animation */
-moz-animation-name: animation2;
-moz-animation-duration: 0.3s;
-moz-animation-timing-function: linear;
-moz-animation-iteration-count: 1;
-moz-animation-direction: normal;
-moz-animation-delay: 0;
-moz-animation-play-state: running;
-moz-animation-fill-mode: forwards;
-webkit-animation-name: animation2;
-webkit-animation-duration: 0.3s;
-webkit-animation-timing-function: linear;
-webkit-animation-iteration-count: 1;
-webkit-animation-direction: normal;
-webkit-animation-delay: 0;
-webkit-animation-play-state: running;
-webkit-animation-fill-mode: forwards;

/*-webkit-transition:all 0.3s ease-in-out;
-moz-transition:all 0.3s ease-in-out;
-o-transition:all 0.3s ease-in-out;
-ms-transition:all 0.3s ease-in-out;
transition:all 0.3s ease-in-out;*/
}
/* animation delays */
#flyingmenubt li:hover ul li:nth-child(1) {
-moz-animation-delay: 0;
-webkit-animation-delay: 0;
}
#flyingmenubt li:hover ul li:nth-child(2) {
-moz-animation-delay: 0.05s;
-webkit-animation-delay: 0.05s;
}
#flyingmenubt li:hover ul li:nth-child(3) {
-moz-animation-delay: 0.1s;
-webkit-animation-delay: 0.1s;
}
#flyingmenubt li:hover ul li:nth-child(4) {
-moz-animation-delay: 0.15s;
-webkit-animation-delay: 0.15s;
}
#flyingmenubt li:hover ul li:nth-child(5) {
-moz-animation-delay: 0.2s;
-webkit-animation-delay: 0.2s;
}
#flyingmenubt li:hover ul li:nth-child(6) {
-moz-animation-delay: 0.25s;
-webkit-animation-delay: 0.25s;
}
#flyingmenubt li:hover ul li:nth-child(7) {
-moz-animation-delay: 0.3s;
-webkit-animation-delay: 0.3s;
}
#flyingmenubt li:hover ul li:nth-child(8) {
-moz-animation-delay: 0.35s;
-webkit-animation-delay: 0.35s;
}
7.الان اضغط حفظ.
8.الان اضغط على تخطيط و اضف اداة "HTML/Javascript"
9.الصق الكود التالي:

الشريط ذا الكتابه البيضاء:

  طبعا في الكود تم استبدال الكتابه الانجليزيه إلى العربيه
فيجب عليك تعديل الروابط فقط .

<ul id="flyingmenubt">
<li><a href="
http://www.blogger-archive.com//">الرائيسيه</a></li>
<li><a class="hsubs" href="#">القائمة 1</a>
<ul class="subs">
<li><a href="#">تعديل 1</a></li>
<li><a href="#">
تعديل 2</a></li>
<li><a href="#"> تعديل 3</a></li>
<li><a href="#"> تعديل 4</a></li>
<li><a href="#"> تعديل 5</a></li>
</ul>
</li>
<li><a class="hsubs" href="
http://www.blogger-archive.com//">القائمة 2</a>
<ul class="subs">
<li><a href="#">
تعديل 2-1</a></li>
<li><a href="#"> تعديل 2-2</a></li>
<li><a href="#"> تعديل 2-3</a></li>
<li><a href="#"> تعديل 2-4</a></li>
<li><a href="#"> تعديل 2-5</a></li>
<li><a href="#"> تعديل 2-6</a></li>
<li><a href="#"> تعديل 2-7</a></li>
<li><a href="#">تعديل 2-8</a></li>
</ul>
</li>
<li><a class="hsubs" href="#">
القائمة 3</a>
<ul class="subs">
<li><a href="#">
تعديل 3-1</a></li>
<li><a href="#">تعديل 3-2</a></li>
<li><a href="#">تعديل 3-3</a></li>
<li><a href="#">تعديل 3-4</a></li>
<li><a href="#">تعديل 3-5</a></li>
</ul>
</li>
<li><a href="#">قائمة 4</a></li>
<li><a href="#">
قائمة 5</a></li>
<li><a href="#">قائمة 6</a></li>
<li><a href="http://www.blogger-archive.com/">رجوع</a></li>
</ul>
 الكتابه الزرقاء اسم الزر 
و الحمراء الرابط.

اخيرا ارجو ان يستفيد الجميع من الموضوع
و اي استفسار يمكنك وضعه في تعليق
وساقوم بالاجابه عنه في اقرب وقت
ممكن ان شاء الله.
تحيااتي.

الاثنين، 26 نوفمبر 2012

ازرار المواقع الاجتماعيه بشكل جميل وذات تأثير رائع

http://i.imgur.com/sHHXr.png
 
السلام عليكم! في هذا الموضوع ساتطرق لكيفية اضافة ازرار
المواقع الاجتماعيه بشكل انيق وذات تأثير جميل كما في الصوره اعلاه
 طبعا تم ترجمة الموضوع من قِبل مدونة ارشيف بلوجر ,المصدر 
فارجو ان تنال الاضافة اعجابكم الان مع كيفية التركيب.

  1. اذهب للوحة تحكم مدونتك.
  2. اذهب إلى تخطيط .
  3.  اضف اداة HTML/Javascript' و الصق الكود التالي بداخلها  ثم حفظ.
/*--------Social Sharing Widget ------*/
<style type="text/css">
.socialsharing {
display: block;
margin: 2em auto;
width: 200px;
height:40px;
}
.socialsharing span {
float: left;
display: inline;
margin-right: 8px;
}
.socialsharing span a {
display: block;
width: 32px;
height: 32px;
text-indent: -9999px;
background-color: none;
background: transparent url("https://blogger.googleusercontent.com/img/b/R29vZ2xl/AVvXsEh-Bten41esdYn9X51WIBg9n_Ejqq1a2BSmkGPZmZYzp6WsjN2XNRHPP6vdA_KpvGeKeXpY8l-7Lx5pFwzwP6rIYzu4ICMQ81Qr5eYkJv5Q9ng9zBHzqqIWwpN_3qxMggZIlBc6NPDbbL-L/s1600/social+icon.png") 0 0 no-repeat;
}
#iconTwitter {background-position: -33px -33px;}
#iconFacebook {background-position: -66px -33px;}
#iconRSS {background-position: 0 -33px;}
#iconYouTube {background-position: -99px -33px;}
#iconGooglePlus {background-position: -132px -33px;}
#iconTwitter:hover {background-position: -33px 0;}
#iconFacebook:hover{background-position:-66px 0}
#iconRSS:hover{background-position:0 0}
#iconYouTube:hover{background-position:-99px 0}
#iconGooglePlus:hover{background-position:-132px 0}
</style>

<div class="socialsharing">
<a href="http://www.twitter.com/bloggerarchive" id="iconTwitter" target="_blank" title="Follow us on Twitter">Twitter</a>
<a href="http://www.facebook.com/bloggerarchive" id="iconFacebook" target="_blank" title="Join us at Facebook">Facebook</a>
<a href="http://feeds.feedburner.com/bloggerarchive" id="iconRSS" target="_blank" title="Subscribe our RSS Feed">RSS</a>
<a href="http://www.blogger.com/youtube.com/bloggerarchive" id="iconYouTube" target="_blank" title="Follow our YouTube Channel">YouTube</a>
<a href="https://plus.google.com/123456789005648565/posts" id="iconGooglePlus" target="_blank" title="Follow us at Google+">Google</a></div>

عدل الاجزاء الملونه في الكود بالمطلوب.
واي استفسار يمكنك وضعه في تعليق في هذه التدوينيه وسيتم الرد عليه في اقرب وقت ممكن.
تحياتي.

اضافة تأثير تكبير الصوره وانزلاق الطبقه الاماميه منها عند تحريك المؤشر فوقها

http://i.imgur.com/mOmQl.png
السلام عليكم ورحمة الله وبركاته.
اقدم لكم في هذا الموضوع كيفية اضافة تأثير جميل على الصوره 
كمت ترا اعلاه فإن الصوره تكبر عند تحريك المؤشر عليها يمكنك

استخدام هذه الاضافة في امور التبادل الاعلاني او قد تستخدم بالنسبه
لمدونات القوالب في عرض تصنيفات القوالب بشكل جميل عبر هذه الاضافه 
وغيرها الاستخدامات المختلفه  تم ترجمة الموضوع من
فارجو ان تنال الاضافة اعجابكم الان مع كيفية التركيب.
  1. اذهب للوحة تحكم مدونتك .
  2. القالب.
  3. تحرير HTML'
  4. متابعه و اشر على توسيع القوالب.
  5. اضغط Ctrl+F من لوحة المفاتيح.
  6. ابحث عن الوسم التالي:
  ]]></b:skin>
7. قم بلصق الكود التالي فوقه مباشره:
/* The CSS3 image galler by blogger-archive.com */
.photos {
width: 300px;
height: 300px;
margin: 100px auto;
position:relative;}
.photos > div {
background-color: rgba(128, 128, 128, 0.5);
border: 2px solid #444;
float: left;
height: 70px;
margin: 5px;
overflow: hidden;
position: relative;
width: 70px;
z-index: 1;
-webkit-border-radius: 10px;
-moz-border-radius: 10px;
-ms-border-radius: 10px;
-o-border-radius: 10px;
border-radius: 10px;
-webkit-transform:scale(1.0);
-moz-transform:scale(1.0);
-ms-transform:scale(1.0);
-o-transform:scale(1.0);
transform:scale(1.0);
-webkit-transition-duration: 0.5s;
-moz-transition-duration: 0.5s;
-ms-transition-duration: 0.5s;
-o-transition-duration: 0.5s;
transition-duration: 0.5s;
}
.photos > div img{
width: 100%;
}
.photos > div:hover{
z-index: 10;
-webkit-transform:scale(2.0);
-moz-transform:scale(2.0);
-ms-transform:scale(2.0);
-o-transform:scale(2.0);
transform:scale(2.0);
}
.photos > div div {
background: url(https://blogger.googleusercontent.com/img/b/R29vZ2xl/AVvXsEjC8S5dLC82Vt7PExIdnn-_Pi3flBZuCqogq-9BIUIv7v2uFauyce6vc7yvGaYqYYAfaVHys8oY9-9ORlhthSe8HKWDoF-GR8cIrvCTtLn128fs1yM02NNleaO0-ztpJPPM69xt-IDx31o/s1600/hover.gif) repeat scroll 0 0 transparent;
cursor: pointer;
height: 100px;
left: 0;
opacity: 0.7;
position: absolute;
top: 0;
width: 100px;
z-index: 15;
-webkit-transition-duration: 1.5s;
-moz-transition-duration: 1.5s;
-ms-transition-duration: 1.5s;
-o-transition-duration: 1.5s;
transition-duration: 1.5s;
}
.photos > div:nth-child(1):hover div {
height: 0%;
}
.photos > div:nth-child(2):hover div {
height: 0%;
margin-top: 100px;
}
.photos > div:nth-child(3):hover div {
width: 0%;
}
.photos > div:nth-child(4):hover div {
margin-left: 100px;
width: 0%;
}
.photos > div:nth-child(5):hover div {
height: 0%;
margin-left: 150px;
margin-top: 50px;
width: 0%;
}
.photos > div:nth-child(6):hover div {
margin-left: 150px;
width: 0%;
}
.photos > div:nth-child(7):hover div {
height: 0%;
margin-left: 150px;
margin-top: 50px;
width: 0%;
-webkit-transform: rotateX(360deg);
-moz-transform: rotate(360deg);
-ms-transform: rotate(360deg);
-o-transform: rotate(-360deg);
transform: rotate(-360deg);
}
.photos > div:nth-child(8):hover div {
height: 0%;
margin-left: 150px;
margin-top: 50px;
width: 0%;
-webkit-transform: rotateZ(600deg);
-moz-transform: rotateZ(600deg);
-ms-transform: rotateZ(600deg);
-o-transform: rotateZ(600deg);
transform: rotateZ(600deg);
}
.photos > div.pair div {
width: 100px;
}
.photos > div.pair div:nth-child(odd) {
margin-left: 100px;
}
.photos > div.pair:hover div {
width: 0%;
}
.photos > div.pair:hover div:nth-child(odd) {
margin-left: 100px;
}
8. اضغط حفظ.
9.اذهب إلى تخطيط .
10. اضف اداة HTML/Javascript' و الصق الكود التالي بداخلها  ثم حفظ.

<div class="photos">
<div>
<a href="الرابط" target="blank"><img src="رابط الصوره1" /></a>
<div></div></div><div>

<a href="الرابط" target="blank"><img src="رابط الصوره2" /></a>
<div></div><div></div>

<a href="الرابط" target="blank"><img src="رابط الصوره3" /></a>
<div></div><div></div>

<a href="الرابط" target="blank"><img src="رابط الصوره4" /></a>
<div></div><div></div>

<a href="الرابط" target="blank"><img src="رابط الصوره5" /></a>
<div></div><div></div>

<a href="الرابط" target="blank"><img src="رابط الصوره6" /></a>
<div></div><div></div>

<a href="الرابط" target="blank"><img src="رابط الصوره7" /></a>
<div></div><div></div>

<a href="الرابط" target="blank"><img src="رابط الصوره8" /></a>
<div></div> </div>

<div class="pair">
<a href="الرابط" target="blank"> <img src="رابط الصوره9" /></a>
<div></div> <div></div>
</div>
</div>
 الان عدل " رابط الصوره "  الذي في الكود اعلاه برابط الصوره التي تريدها .
عدل " الرابط  "  الذي في الكود اعلاه برابط الذي تريده ان يفتح عند نقر الشخص على احدى الصور.
واي استفسار يمكنك وضعه في تعليق في هذه التدوينيه وسيتم الرد عليه في اقرب وقت ممكن.
تحياتي.

السبت، 24 نوفمبر 2012

ازرار المواقع الاجتماعية عائمة تخرج من الدائره عند تحريك الماوس فوقها

http://allbloggingtips.com/wp-content/uploads/2012/11/widget.png 
السلام عليكم ورحمة الله وبركاته.

 اهلا وسهلا بكم في موضوع جديد وهذه المره اقدم لكم شرح اضافة
كما ترون في الصورة اعلاه فهي دائره مكتوب فيها "SHARE"  عند
تحريك المؤشر فوقها تخرج ازرار المواقع الاجتماعيه منها 
طبعا هذه الاضافة تكون عائمة في كل صفحات المدونه
  تم ترجمة الموضوع من قِبل مدونة ارشيف بلوجر ,المصدر 
فارجو ان تنال الاضافة اعجابكم الان مع كيفية التركيب.
  1. اذهب للوحة تحكم مدونتك .
  2. القالب.
  3. تحرير HTML'
  4. متابعه و اشر على توسيع القوالب.
  5. اضغط Ctrl+F من لوحة المفاتيح.
  6. ابحث عن الوسم التالي:
  <div class=’post-footer-line post-footer-line-1′>
7.الان الصق الكود التالي بعد الوسم مباشرة.
<b:if cond='data:blog.pageType == &quot;item&quot;'>
<style type="text/css">
.ringMenu {
width: 100px;
margin: 150px auto;
}
.ringMenu ul {
list-style: none;
position: relative;
width: 100px;
color: white;
}
.ringMenu ul a {
color: white;
}
.ringMenu ul li {
-webkit-transition: all 0.3s ease-in-out;
-moz-transition: all 0.3s ease-in-out;
-o-transition: all 0.3s ease-in-out;
-ms-transition: all 0.3s ease-in-out;
transition: all 0.3s ease-in-out;
}
.ringMenu ul li a {
display: block;
width: 100px;
height: 100px;
background: rgba(50,50,50,0.7);
text-align: center;
line-height: 100px;
-webkit-border-radius: 50px;
border-radius: 50px;
font-size: 20px;
}
.ringMenu ul li a:hover {
background: rgba(230,150,20,0.7);
text-decoration: none;
}

.ringMenu ul li:not(.main) {
-webkit-transform: rotate(-180deg) scale(0);
-moz-transform: rotate(-180deg) scale(0);
-o-transform: rotate(-180deg) scale(0);
transform: rotate(-180deg) scale(0);
opacity: 0;
}
.ringMenu:hover ul li {
-webkit-transform: rotate(0) scale(1);
-moz-transform: rotate(0) scale(1);
-o-transform: rotate(0) scale(1);
transform: rotate(0) scale(1);
opacity: 1;
}
.ringMenu ul li.top {
-webkit-transform-origin: 50% 152px;
-moz-transform-origin: 50% 152px;
-o-transform-origin: 50% 152px;
transform-origin: 50% 152px;
position: absolute;
top: -70px;
left: 50px;
}
.ringMenu ul li.bottom {
-webkit-transform-origin: 50% -52px;
-moz-transform-origin: 50% -52px;
-o-transform-origin: 50% -52px;
transform-origin: 50% -52px;
position: absolute;
bottom: -70px;
left: 50px;
}
.ringMenu ul li.right {
-webkit-transform-origin: -52px 50%;
-moz-transform-origin: -52px 50%;
-o-transform-origin: -52px 50%;
transform-origin: -52px 50%;
position: absolute;
top: 10px;
right: -50px;
}
.ringMenu ul li.left {
-webkit-transform-origin: 152px 50%;
-moz-transform-origin: 152px 50%;
-o-transform-origin: 152px 50%;
transform-origin: 152px 50%;
position: absolute;
top: 10px;
left: -50px;
}
</style>
<div class="ringMenu">
<script type="text/javascript">var switchTo5x=false;</script>
<script type="text/javascript" src="http://w.sharethis.com/button/buttons.js"></script>
<script type="text/javascript">stLight.options({publisher: "ur-e9856caa-8f3b-40a6-82af-461e390fe167"});</script>
<ul>
<li class="main"><a href="#main">SHARE</a></li>
<li class="top"><span class='st_fblike_vcount' displayText='Like'></span></li>
<li class="right"><span class='st_sharethis_vcount' displayText='Share'></span></li>
<li class="bottom"><span class='st_plusone_vcount' displayText='+1'></span></li>
<li class="left"><span class='st_twitter_vcount' displayText='Tweet'></span></li>
</ul>
</div>
</b:if>
اضغط حفظ وبهذا تكون انتهيت.


طبعاً اي استفسار يمكنك وضعه في تعليق هنا كما ارجو منك
الضغط على ازرار المواقع الاجتماعيه ادناة
تحياتي.

كيفية اضافة صندوق متابعه في تويتر شبيه بالفيس بوك

https://blogger.googleusercontent.com/img/b/R29vZ2xl/AVvXsEhR-yEKnstbVqRytIDFfP9eThu9VwHUTdWXEA11rSlL1ZdjRLiYTvWyfduVV6kvNdGdNTsmxJIN6HamJmKeh6hbYlwn5fHwZKpJQgJlLAtP-Os7_psQKkJ4jukQ8awVksr20Ds3OxsRtJnr/?imgmax=800 
السلام عليكم! في هذا الموضوع ساتطرق لكيفية اضافة صندوق المتابعين 
او المتابعه في تويتر طبعا هو شبيه بالتابع للفيس بوك لكن هذا لتويتر
طبعا تم ترجمة الموضوع من قِبل مدونة ارشيف بلوجر ,المصدر 
فارجو ان تنال الاضافة اعجابكم الان مع كيفية التركيب.

  1. اذهب للوحة تحكم مدونتك.
  2. اذهب إلى تخطيط .
  3.  اضف اداة HTML/Javascript' و الصق الكود التالي بداخلها  ثم حفظ.
<!-- Twitter Follower Box www.blogger-archive.com -->
<script type='text/javascript'>
function fanbox_init(screen_name){document.getElementById('twitterfanbox').innerHTML='\<iframe name=\"fbfanIFrame_0\" frameborder=\"0\" allowtransparency=\"true\" src=\"http://s.moopz.com/connect.html?user='+screen_name+'\" class=\"FB_SERVER_IFRAME\" scrolling=\"no\" style=\"width: 295px; height: 250px; border-top-style: none; border-right-style: none; border-bottom-style: none; border-left-style: none; border-width: initial; border-color: initial; \"\>\<\/iframe\>';}
</script>
<div id="twitterfanbox"></div><script
type="text/javascript">fanbox_init("BloggerArchive");</script
type="text>
<!-- End Twitter Follower Box -->

 الان عدل " BloggerArchive "  الذي في الكود اعلاه باسمك في تويتر .
واي استفسار يمكنك وضعه في تعليق في هذه التدوينيه وسيتم الرد عليه في اقرب وقت ممكن.
تحياتي.

شريط علوي متعدد الالوان للبلوجر و الوورد برس

http://i.imgur.com/WSqwv.png
السلام عليكم ورحمة الله وبركاته.


 اهلا وسهلا بكم في موضوع جديد وهذه المرة عن القوائم العلويه
هي شئ مهم تساعد الزائر على الوصول للاقسام او الصفحات بشكل اسرع
طبعا تم ترجمة الموضوع من قِبل مدونة ارشيف بلوجر ,المصدر 
فارجو ان تنال الاضافة اعجابكم الان مع كيفية التركيب.
  1. اذهب للوحة تحكم مدونتك .
  2. القالب.
  3. تحرير HTML'
  4. متابعه و اشر على توسيع القوالب.
  5. اضغط Ctrl+F من لوحة المفاتيح.
  6. ابحث عن الوسم التالي:
  ]]></b:skin>
7. قم بلصق الكود التالي فوقه مباشره:
/* The CSS Code for the menu starts here blogger-archive.com */
.cbdb-menu li {
display: block;
float: left;
line-height: 35px;
list-style:none;
margin: 0 5px;}
.cbdb-menu li a {
/* This generators the gradient on top of the solid color */
background-image: -webkit-gradient(
linear,
left top,
left bottom,
color-stop(0, rgba(255,255,255,.5)),
color-stop(1, rgba(0,0,0,.1))
);
background-image: -moz-linear-gradient(
center top,
rgba(255,255,255,.5) 0%,
rgba(0,0,0,.1) 100%
);
color: #f4f4f4; /* IE */
color: rgba(255, 255, 255, 0.8);
display: block;
font: bold 18px "Myriad Pro","Lucida Grande",Helvetica,Arial,sans-serif;
outline:none;
padding: 5px 15px;
text-decoration: none;
text-shadow: 1px 1px 1px rgba(0, 0, 0, 0.4);
border-radius: 5px;
-moz-border-radius: 5px;
-webkit-border-radius: 5px;
box-shadow: 1px 1px 2px rgba(0, 0, 0, 0.65);
-moz-box-shadow: 1px 1px 2px rgba(0, 0, 0, 0.65);
-webkit-box-shadow: 1px 1px 2px rgba(0, 0, 0, 0.65); }
.cbdb-menu li a:active {
background-image: -webkit-gradient(
linear,
left bottom,
left top,
color-stop(0,rgba(255,255,255,.5)),
color-stop(.1,rgba(255,255,255,.2)),
color-stop(.85, rgba(0,0,0,.2)),
color-stop(100, rgba(0,0,0,.4))
);
background-image: -moz-linear-gradient(
center bottom,
rgba(255,255,255,.5) 0%,
rgba(255,255,255,.2) 10%,
rgba(0,0,0,.2) 85%,
rgba(0,0,0,.4) 100%
);
}
/* Dark Text */
.cbdb-menu li a.dark {
color: #333; /* IE */
color: rgba(0, 0, 0, 0.8);
text-shadow: 1px 1px 1px rgba(255, 255, 255, 0.4);
}
/*********** COLORS *************/
/* Create your own class for your own colors */
.red {
background: #B80202;
border: #B80202 1px solid}
.red:hover, .red:focus{
background-color:#e30606
}
.green {
background: #46c431;
border: #46c431 1px solid}
.green:hover,.green:focus {
background-color:#44e329
}
.yellow {
background: #D9CE1C;
border: #D9CE1C 1px solid}
.yellow:hover,.yellow:focus {
background-color:#eee117}
.cyan {
background: #23c6de;
border: #23c6de 1px solid}
.cyan:hover,.cyan:focus {
background-color:#18d8f4
}
.blue {
background: #3271d9;
border: #3271d9 1px solid}
.blue:hover,.blue:focus {
background-color:#377ef2
}

7.الان اضغط حفظ.
8.الان اضغط على تخطيط و اضف اداة "HTML/Javascript"
9.الصق احدى الاكواد التاليه:

الشريط ذا الكتابه البيضاء:

css3+light+menu
  طبعا في الكود تم استبدال الكتابه الانجليزيه إلى العربيه
فيجب عليك تعديلها وتعديل الروابط.

<ul class="cbdb-menu">

<li><a href="#" class="red">الرائيسيه</a> </li>
<li><a href="#" class="green">تعديل</a></li>
<li><a href="#" class="yellow">تعديل</a></li>
<li><a href="#" class="cyan">تعديل</a> </li>
<li><a href="www.blogger-archive.com" class="blue">تعديل</a></li>

</ul>
 الكتابه الزرقاء اسم الزر 
و الحمراء الرابط.
كذالك اذا اردت ان تكون الكتابه في الازرار سوداء عدل نفس التعديلات في الكود التالي:
css3+dark+menu

<ul class="cbdb-menu">
<li><a href="#" class="red dark">الرائيسيه</a> </li>
<li><a href="#" class="green dark">تعديل</a></li>
<li><a href="#" class="yellow dark">تعديل</a></li>
<li><a href="#" class="cyan dark">تعديل</a> </li>
<li><a href="http://www.blogger-archive.com/" class="blue dark">تعديل</a></li>
</li>
</ul>
اخيرا ارجو ان يستفيد الجميع من الموضوع
و اي استفسار يمكنك وضعه في تعليق
وساقوم بالاجابه عنه في اقرب وقت
ممكن ان شاء الله.
تحيااتي.

